Printing Patterns
KEY IDEAS
- Learning about relief prints
- Experiencing the power of repetition in design
- Experimenting with different colors and printing patterns
LANGUAGE
relief print, repetition, pattern, organic, geometric
YOU WILL NEED
- Rice paper or other absorbent printing paper, 6 by 6 inches ( 12 each)
- 1-inch square gum erasers (one each)
- Guide sheets
- Black fine-line permanent markers
- A variety of linoleum carving tools (liners, v-gouges, u-gouges, and large gouges)
- Exacto knife
- Broad-tipped watercolor markers
- Scrap paper for testing prints
- Magazines for printing pads (one for each child)
- Toothbrush
- Paper towels
How to Begin
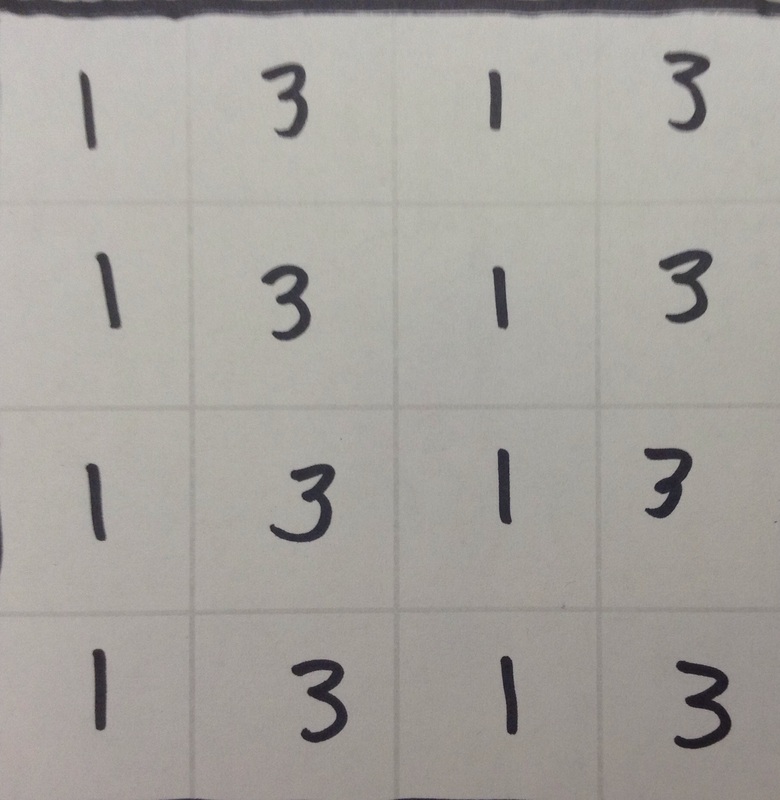
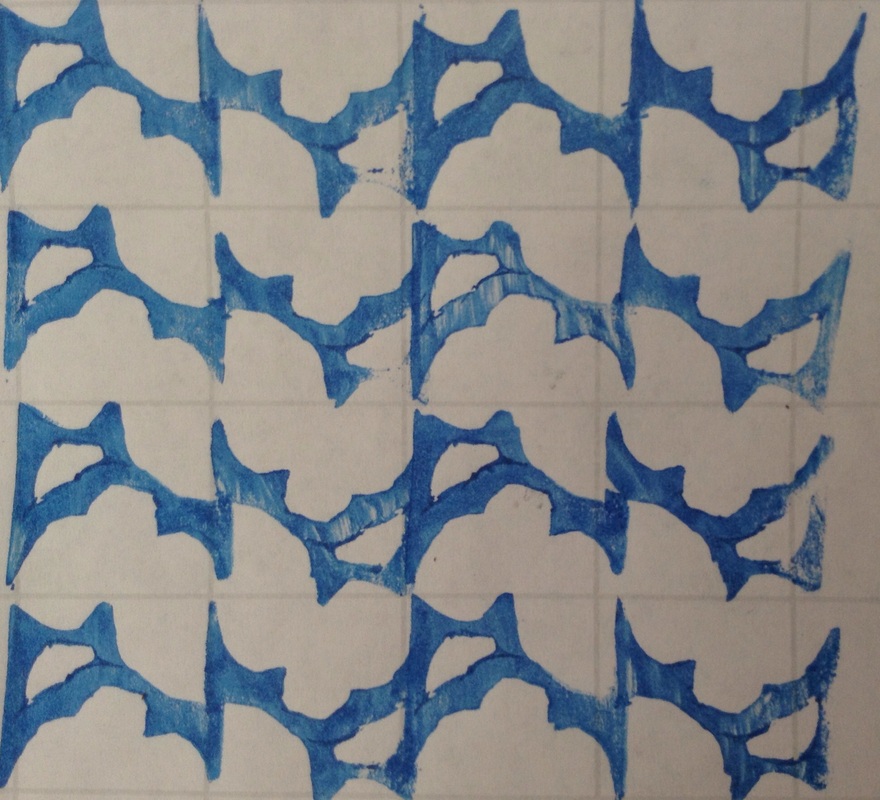
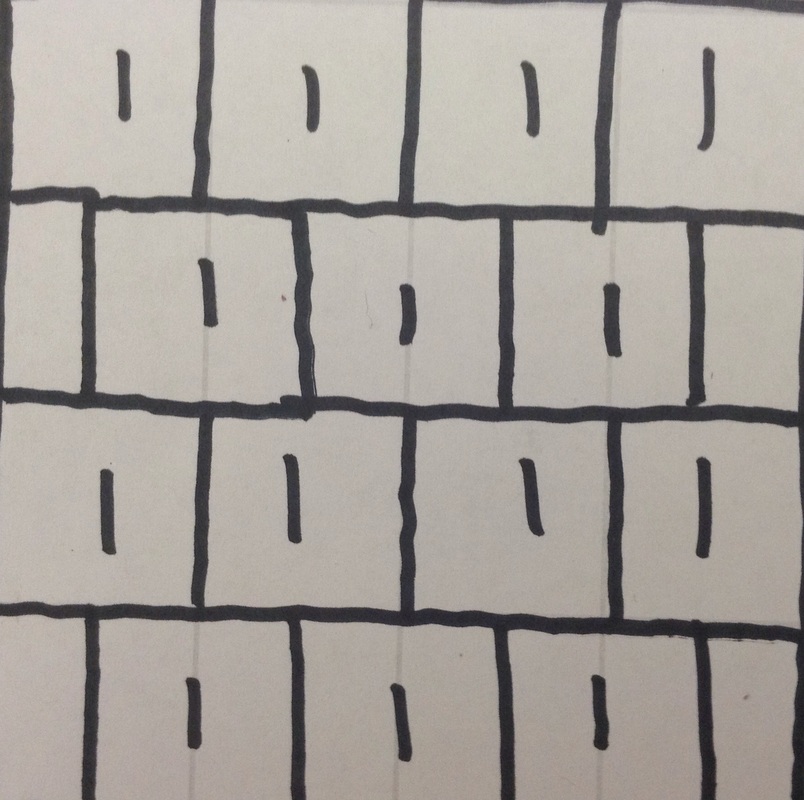
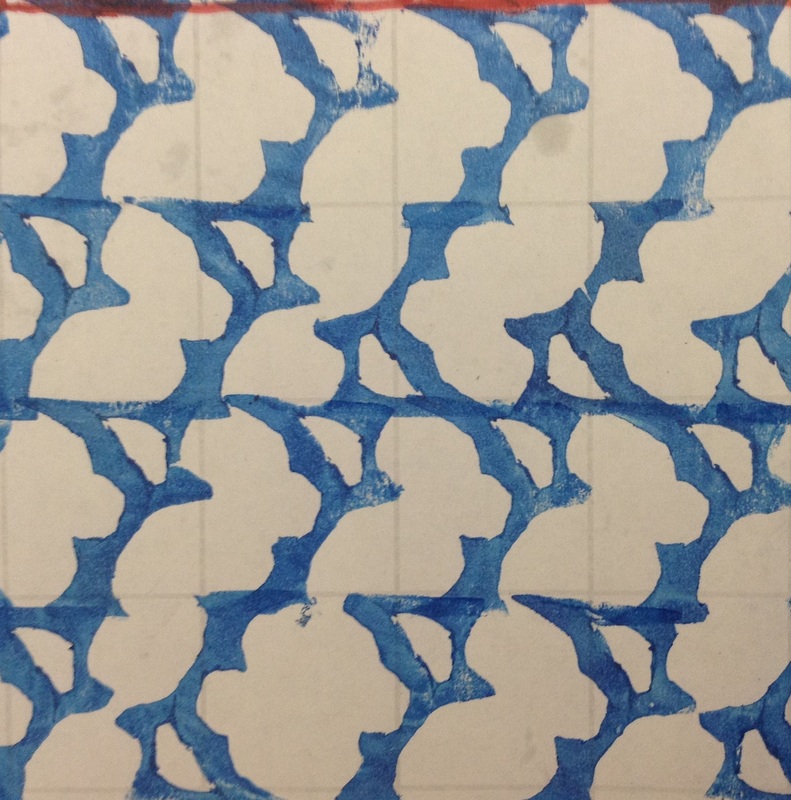
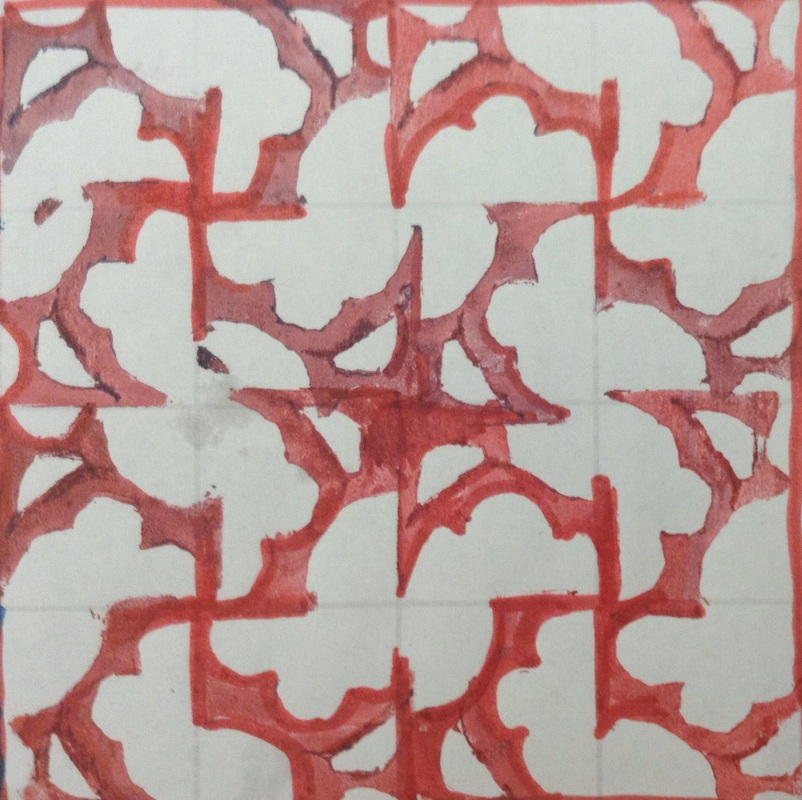
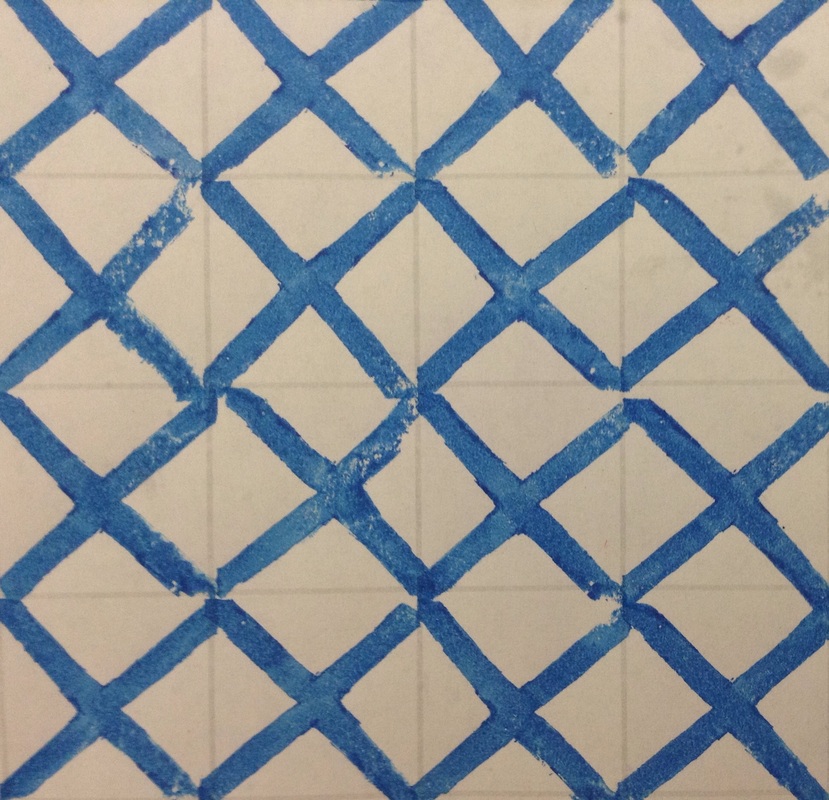
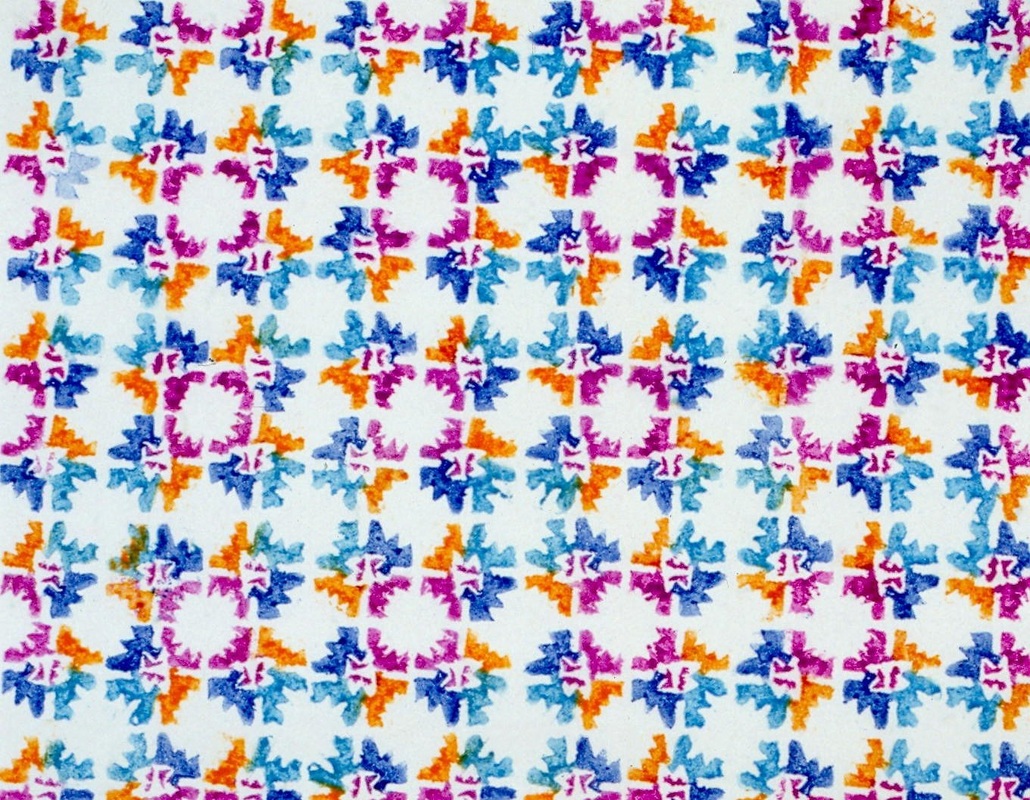
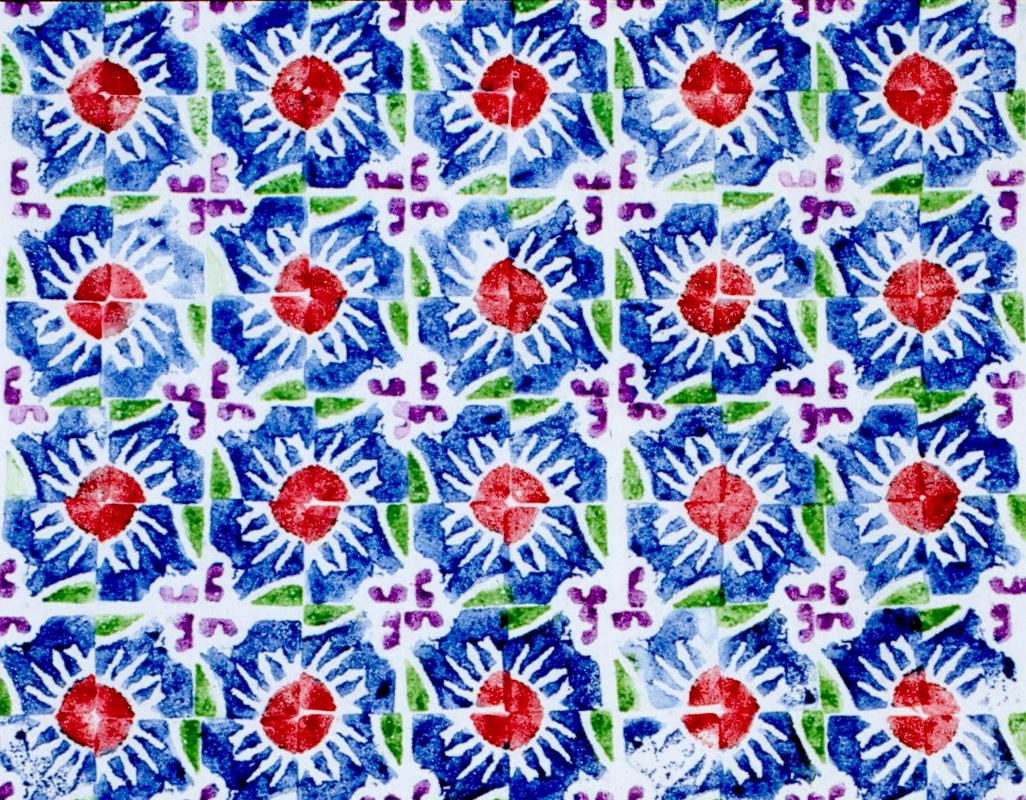
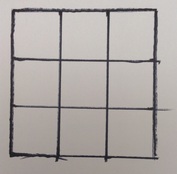
- In your sketchbooks draw two 3x3 grids. One grid will be organic designs, and one will be geometric designs. In each 1x1 box create a design using geometric shapes or organic shapes. Choose one and use your pencil to darken the design. Lay your eraser on top of the design and push firmly to transfer. Cut out the lines or the spaces between the lines with the carving tools. Remove any bits of eraser caught in the cut-away areas with a toothbrush.
- Number the sides of your eraser with a sharpie.
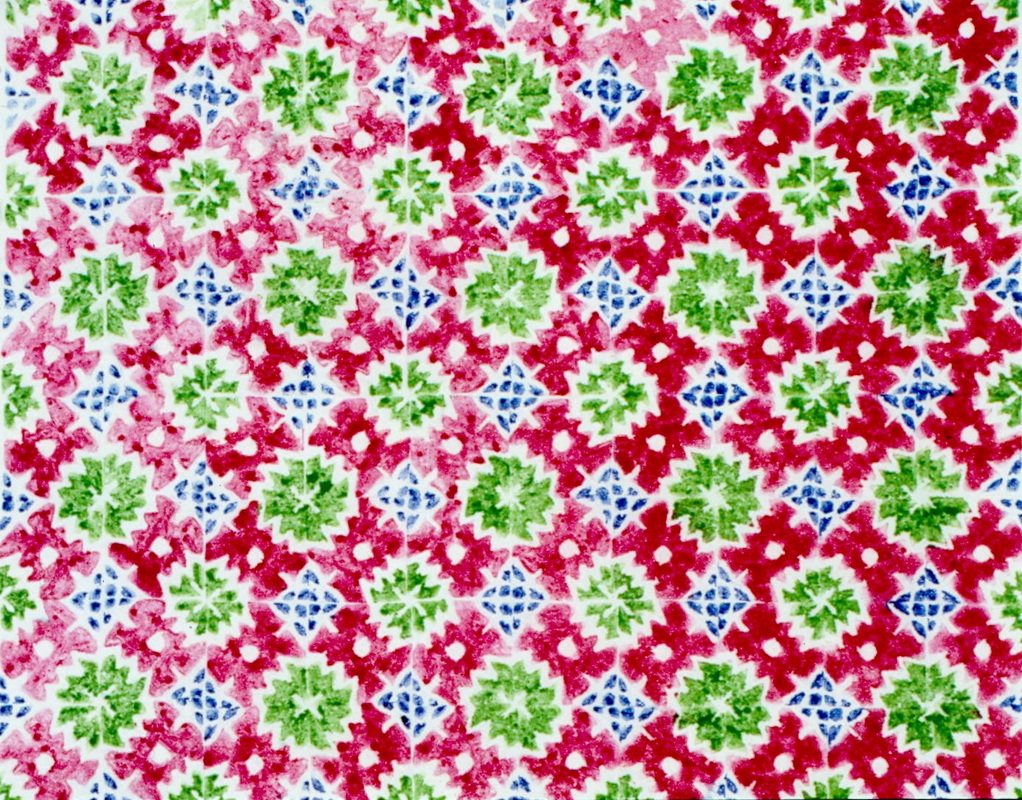
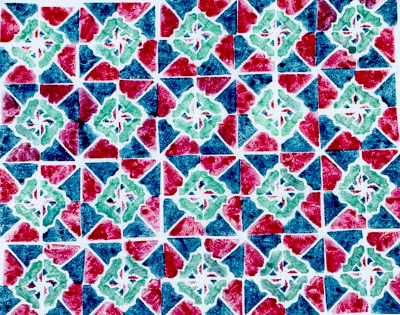
- You will be creating 4 4x4 patterns, using your geometric and organic stamps.
- Pattern 1 Standard
- Pattern 2 Alternate
- Pattern 3 Offset
- Pattern 4 Rotate
- Choose two to four colors of markers to fill in the different sections of the design on the eraser, using the lighter colors first. Work steadily so that the print can be made before the watercolor dries. Press the carved side of the eraser down firmly on the paper, hold for a second, and lift in a straight-up motion. Check to see that the lines printed clearly. If not, make repairs by trimming where necessary, applying more color, and printing again. Emphasize that the watercolor must be reapplied before each impression is made.
- Experiment with different colors by wiping off the eraser with a damp sponge and drying it well. Apply new colors and test again.
Get to work!